crystalsnow's blog
This is really a guide for that Jabzon in the present D2R patch (2.6). This comprehensive guide aims to assist new players unlock the entire potential of the Jab Amazon character focussed on her behalf job skill. While not one of the most popular builds, the Jabzon is really a powerful melee character similar to a Zealer, Frenzy Barb, or any other melee physical damage dealer.
The Jab Amazon: A Brief Overview
The Jab Amazon is really a melee-focused character focusing on the use of spears or javelins. She is really a versatile and powerful warrior, able to deal massive levels of physical and elemental damage (if equipped to do this). Her high attack speed and mobility make her a formidable opponent both in PvE and PvP content and offer an interesting option to the standard bowazon or Javazon. Players can buy d2r ladder runes and diablo 4 gold from a trustworthy shop like MMOWTS to gain access to powerful new abilities and strategies.
Stat Allocation:
As you level up, distribute your stat points as follows:
Strength: Enough to equip your desired gear.
Dexterity: Primary focus for increased attack rating and damage.
Vitality: Secondary focus for additional survivability.
Energy: Minimal investment, as you'll depend on leech and potions for mana.
Skill Tree Breakdown
The Jab Amazon's skills are split into three trees: Javelin and Spear, Passive and Magic, and Bow and Crossbow. Focus on the next skills for any potent Jab Amazon build:
Skills to the max:
1. Jab doesn't have damage synergizes which is beneficial as you will have additional points to wield.
2. Fend provides you harm to adjacent targets and it is useful for farming areas such as the Cow level.
3. Penetrate increases your attack rating substantially upping your chance to hit for Jab and Fend.
4. Critical Strike provides you an enormous boost to % in doubling you're on hit damage. This coupled with Deadly Strike is really a potent combo.
5. Valkyrie is really a great choice to use all your remaining skill points and offers you a powerful ally in combat who are able to help soak damage.
Other skills and pre-requisites:
1. Impale is like a prereq to Fend.
2. Invest 1-5 Points into Dodge, Evade, and Avoid.
3. Inner Sight and Slow Missiles as prerequisites to Valkyrie, and powerful combat buff tools either to increase your opportunity to hit or reduce enemy missile speed.
4. Decoy provides you with one more soaker and is really a prereq to Valkyrie.
Gear Selection:
When selecting gear for the Jab Amazon, prioritize the next stats:
Increased Attack Speed (IAS): Essential for maximizing your Jab along with other attack skills.
Enhanced Damage: More damage means faster killing.
Life Leech and Mana Leech: Keep your health insurance and mana replenished during combat.
Resistances: Aim for maximum resistances to mitigate incoming elemental damage.
Detailed gear suggestions with alternatives
Weapon
Primary: Titan's Revenge (Unique Ceremonial Javelin) for enhanced damage, skills, and replenishment quantity. An Ethereal one with High ED and Life leech will give you a powerful one-handed option and is really a go-to for a lot of Jabzons.
Alternative: High-damage rare spear or javelin with IAS, enhanced damage, and leech.
Alternative: Ethereal Breath from the Dying inside a 2-handed spear offers the highest damage option if you're willing to forgo the shield and additional defenses.
Armor
Primary: Fortitude (Rune Word) for enhanced damage, resistance, and life. This is the most effective armor choice because of the huge boost to break.
Alternative: Chains of Honor (Rune Word) for +skills, resistances, and damage reduction. Consider this option if survivability is a problem.
Helmet
Primary: Guillaume’s Face may be the highest damage option providing a substantial boost to Crushing Blow and Deadly Strike. Use this for the fastest clear possible.
Alternative: Andariel's Visage (Unique Demonhead) for IAS, +skills, and life leech. This is really a powerful option but bears in mind you should counterbalance the negative fire resistances with Ral or from another source.
Alternative: Vampire Gaze (Unique Grim Helm) for damage reduction, life leech, and mana leech. Great Mid-tier option that's quite easy to locate.
Crown of Ages may be the best defensive option with 30 to any or all res and 15 damage reduction. The two open sockets can be used as jewels, Ber runes, or Um runes based on what you need. Keep in mind the high stat requirement means you are able to invest less in dexterity or vitality.
Magic Find Basics
Magic Find (MF) is a crucial attribute for gear hunting in D2R that boosts the chances of obtaining high-quality items from monsters and chests. The higher your Magic Find, the higher your likelihood of getting exceptional, elite, or unique items. Magic Find creates all monsters but is particularly effective on bosses, super-unique monsters, and champion packs. Note, MF doesn't increase the monster drop rate (only a higher player count increases this). You should also observe that MF reduces the likelihood of bases dropping. Buying d2 resurrected items and diablo 4 items can help boost your gear in D2R Ladder, which benefits physical damage dealers and specs that benefit from scaling.
Best Areas for Magic Finding:

1. The Countess (Act 1)
Located within the Forgotten Tower, The Countess is renowned for dropping vast amounts of runes. While she doesn't drop high-level unique items, she's loaded with runes for players seeking to craft powerful runewords. This is however capped around the mid-high rune, therefore if you’re farming for Ber’s and Jah’s you won't find them here.
2. The Pits (Act 1)
A popular magic-finding location because of its high level and monster density, particularly for that aptly named Pitzerker which excels in leveraging the Find Item skill, to double Champion monster drops within the confined and dense Pit area. Access the pits by entering the Tamoe Highland in the Black Marsh, and locating the Cave.
3. Andariel (Act 1)
Andariel may be the final boss in Act 1, found within the Catacombs Level 4. She has a higher drop rate for unique and hangs items, making her a great target for magic find runs, especially given she may be the easiest Act Boss. Higher-level uniques like Griffon's Eye or Crown of Ages won't drop here, but this is an excellent location to find things like Stones of Jordan. This may be the second most often farmed act boss for MF farming, apart from Mephisto.
4. Ancient Tunnels (Act 2)
The Ancient Tunnels, located within the Lost City, is a great area for magic finding. The area level is 85, meaning most items within the game can drop here. As it contains no cold immunes, it's particularly well-liked by cold sorceresses or any cold-based character. This is one of the few viable farming spots in A2. Maggot Lair and Claw Viper Temple will also be options given their high level but they are tedious or hardship on many character types.
5. Mephisto (Act 3)
Mephisto is located within the Durance of Hate Level 3 and it is one of the most popular magic find targets. With a good map layout, players can easily reach him and farm him for valuable unique and hang items. Mephisto's loot pool includes many sought-after items, making them a top priority for magic find runs. If you have teleport and ranged damage sources, you should use the moat trick to kill Mephisto safely each run. Pull Mephisto for the A4 portal location and teleport over the moat. From there, you ought to be able to reach Mephisto together with your damage, but he won’t be in a position to reach you, despite staying engaged with you. Note the Durance of Hate is another good spot. Clear any champion mobs you discover to maximize your drop chances.
6. Chaos Sanctuary (Act 4)
The Chaos Sanctuary hosts Diablo and many other unique monsters. This area is much more challenging because of the numerous monster packs (with powerful curses) and elemental immunities, however, it can yield rewarding drops. This is really a zone in a position to drop any item within the game. With teleport, by using the Seal opening technique (quickly teleport near monster packs before opening the ultimate seal to ensure you receive XP in the minions that'll be instantly destroyed once the ultimate seal is opened, and also the last seal boss is dead.
7. Pindleskin (Act 5)
Pindleskin is really a super unique monster found within the Nihlathak's Temple beyond Harrogath, certain to drop 1-2 magic or over items. His proximity towards the waypoint and also the ease of killing him make Pindleskin a well-known choice for quick magic find runs. Given he's right next to the entrance, it's recommended you continue your encounter with Nihlathak in case your character can efficiently and safely clear Nilathak’s halls.
8. Nihlathak
Nihlathak supplies a challenging but rewarding MF target if you wish to venture past Pindleskin. His powerful corpse explosion can surprise you, so bear in mind to stay away from fallen monsters; particularly in Hardcore mode. His high level and also the high level of minions inside the levels of his halls mean this is really a strong MF location, although challenging.
9. Terror Zones
Terror zones present an optional challenge that has additional XP and MF perks for people who are at better character levels. The level of the monsters present in terror zone areas is dependent on your character:
Normal Enemies: Your level +2
Champion Enemies: Your level +4
Unique Enemies: Your level +5
This feature is supposed to offer you deep end-game optimization opportunities by leveling your character to 97, ensuring enemies in terror zones are level 99 (cap). This is another way to accelerate XP gain in end-game leveling in which you receive diminishing returns using their company sources that don’t scale together with your level (i.e. Baal or Chaos runs). Terror zones are specifically useful once they spawn inside your usual or favorite farming locations, providing further incentive to farm the zone throughout the hour window.
Meteor Sorceress BiS Weapon
You possess a few standout choices here. Best has become the Heart of Oak, however, the Oculus as well as Tal Rasha's Swirling Crystal do see some play. Heart from the Oak is VERY picky about its base item. If you have any queries, check our guide through the link within the tooltip. The Oculus offers magic find, which is what makes it worth taking into consideration even if you possess the materials for any Heart from the Oak. It's also possible to obtain the four-piece bonus from the Tal Rasha's set, and the items are mainly farmable from Andariel. This is really a feat easily accomplished with a tenacious Meteor Sorceress and her mercenary. Players can buy diablo 4 items and d2r items from a trustworthy shop like MMOWTS to gain access to powerful new abilities and strategies.
Meteor Sorceress BiS Shield
There are lots of options here but clearly, the 4-socketed Monarch Shield using the Spirit Runeword has everything we want. High Defense, +Skills, FCR, and FHR, with a few good resists and damage absorbed. Splendor is really a workable alternative, plus some folks use Rhyme for that resist and Magic Find when they can't obtain the runes or even the desired base item for that BIS shield. One note: the Monarch Shield base item includes a strong dependence on 155. There's no lighter version of the shield which has four sockets, also it does slow you down. But, for that benefits from the Spirit shield, will still be worth it.
Weapon Switch
Like many character classes and builds, the Meteor Sorceress can usually benefit from using a switch weapon. The Call to Arms is definitely popular for this function. It is utilized by switching weapons while using the 'w' key or whatever hotkey you place up for this while using Barbarian Shouts, after which switching back. The main stat about this weapon that you simply care about may be the Battle Command, which will give you increased abilities. The others are nice to possess, if your CTA rolls have less Battle Command, don't be concerned too much. All the increased levels do is result in the buff keeping going longer and avoiding wasting hassle. Unless you are already filled with BIS items, it's not a priority to max that.
You will even want another shield for that weapon switch, probably another Spirit runeword inside a Monarch Shield. It's true that carrying two shields will decrease your run speed. But, whenever you mostly circumvent by teleportation, this is really a minor issue at worst.
Meteor Sorceress BiS Body Armor
Chains of Honor has everything we would like here, even though it requires a Ber rune and could be tricky to find for that reason. Workable alternatives include Tal Rasha's Guardianship, particularly if you are going for that four-slot bonus of this set. Many people also recommend Enigma, while you don't need the teleport, because of its many other useful stats. Skullder's Ire and Skin from the Vipermagi get honorable mentions too, especially at the start of your career.
Meteor Sorceress BiS Helm
The Harlequin's Crest is definitely desirable, but one may even get by having a lucky roll on the rare circlet with +Skills along with other useful stats.
How to obtain rich fast in Diablo 4? The best thing is that exist both of them within the exact same place within 5 minutes. You can make 25000 gold and obtain one to two or maybe more legendaries every 5 minutes, meaning you're making thousands and thousands of gold and filling your inventory in storage with the legendaries your heart could desire.
Find Anica's Claim
The loop you will be doing is actually simple should you start off within the starting City of Kyovashad. You can go completely up to this specific area known as the Bear Tribe Refuge.
Then, go south, and you'll find this unique dungeon, Anica's Claim.
Farm in Anica's Claim
How to perfectly optimize Anica's Claim to help you keep farming incredibly fast?
It would help should you collect Animus from Animus carriers. Each of these Animus carriers is definitely an elite monster, meaning they're likely to be dropping legendaries and magic items. It will become your favorite zones to farm D4 items. And there is something that you need to bear in mind. That is to get all your items.
Clearing through this zone is going to be much easier should you can find pylons. If you visit the left side, there is going to be a pylon about this side. But sometimes, you may have gotten unlucky as possible meeting blocking actions. So essentially, you may either run through the zone or get the pylons after which murder everything.
In Anica's Claim, you will get the Greed Shrine and all sorts of stuff whenever you make the rotative farming. Although getting legendaries is random, you've still got more chances to obtain and sell potentially good legendaries. Usually, you are going to fill up your inventory before getting to the end. You can usually acquire one or two legendaries.
What are you able to do whenever your inventory is full, however, you don't want to leave the dungeon. You can reset the dungeon, which is going to kick you out of trouble of the dungeon. You are likely to teleport to town and then sell all of your items. After selling, you'll run right to your portal. Get into it, and you will be right in front of the dungeon, where you'll run again.
One Tip: Extract Good Aspect by Occultist
If you need to make better utilization of all the legendaries that you are getting from Anica's Claim and do not need them for upgrades, what are you able to do rather than sell them? You can head over toward the Occultist. If you find a specific item that has a really good aspect that you need to save, you are able to extract that aspect and set it on another bit of armor, weapon, or amulet here.
You sell items to obtain more D4 gold or any other earning, but extracting the aspect provides you with a better use for all those legendaries. Players can buy diablo 4 items and d2r items from a trustworthy shop like MMOWTS to gain access to powerful new abilities and strategies.
Leaper Barbarian
The Leaper Barbarian is really a high mobility build that jumps inside a pack of monsters inflicting massive harm to a single target, the AoE damage is extremely subpar in the present state. The developers could give a new War Cry synergy to enhance the AoE harm to help w/ swarming enemies.
Leap Attack Synergies
Leap: +10% Damage per level
War Cry: +10% AoE Damage per level
Singer Barbarian
The Singer Barbarian is really a fun build, however, the damage ultimately tops out a little lower than you might like, which makes it less than optimal. To improve War Cry, the developers could replace Battle Cry synergy w/ Grim Ward because it doesn't take advantage of lowering enemy defense, however, it does take advantage of reducing enemy physical resistance. As War Cry damage is insanely low and also the fact monsters can block you, the brand new Grim Ward synergy would help to make monsters more susceptible by making the skill unblockable. Lastly, adjust the other two synergies as follows.
War Cry Synergies
Howl: +10% Damage per level
Taunt: +10% Damage per level
Grim Ward: -5% Enemy Block Chance per level
Concentrate Barbarian
If you’re a Concentrate Barbarian, you’re likely to want to use Iron Skin to increase your defense. Therefore, it seems sensible to replace the Bash synergy w/ Iron Skin because it better complements the skill while adjusting another synergy as shown below...
Concentrate Synergies
Battle Orders: +15% Damage per level
Berserk: +3% Magic Damage per level
Iron Skin: +1% PDR per level
Frenzy Barbarian
With the high attack and movement speed of the Frenzy Barbarian, this character can easily dispatch his foes. The main disadvantage to this skill may be the sheer number of skill points required to increase frenzy damage, often requiring you to definitely sacrifice Battle Orders. To improve Frenzy, the developers should remove Taunt synergy and adjust other synergies as follows. Players can buy d2r items and diablo 4 items from a trustworthy shop like MMOWTS to gain access to powerful new abilities and strategies.
Frenzy Synergies
Double Swing: +15% Damage per level
Berserk: +3% Magic Damage per level
Increased Stamina: +0.4 Seconds per level
For this Rogue Shadow Blade build in Diablo 4 you won’t require the perfect setup, the build already works should you pick the recommended skills and passive perks. Of course, the build will work even better should you can get hold of the right Legendary items and Aspects for this.
Legendary item drops are virtually guaranteed whenever you complete a dungeon. Therefore they aren’t very difficult to obtain, the drop minute rates are likely to alternate in the live version.
Rogue Skills Setup
Let us check out the Rogue Skills Setup, I will first explain why we pick certain skills and the things they exactly do for that Shadow Blade build. I will also explain how you can spend your skill points accordingly if you're still leveling up.
Rogue Shadow Blade Skills Layout:
Puncture – Left Click
Twisting Blades – Right Click
Dark Shroud – Slot 1
Shadow Step – Slot 2
Shadow Imbuement – Slot 3
Shadow Clone – Slot 4
Passives
You are able to place these skills nevertheless, you prefer.
Puncture Base Skill
Throw blades a short distance, dealing 350 damage. Every 3rd cast Slows enemies by 20% for just two.15 seconds. Critical Strikes will invariably Slow.
Modifier 1 Enhanced Puncture – Gain 2 Energy when Puncture damages a Crowd Controlled enemy.
Modifier 2 Fundamental Puncture – Puncture now throws 3 blades inside a spread, each dealing 35% of their Base damage. Hitting an enemy with a minimum of 2 blades at the same time makes them Vulnerable for just two seconds.
Explanation: This is the basic skill, it's no cost, and maybe spammed as often as you want. Puncture happens to be the best Rogue melee skill in Diablo 4 as it can certainly also hit enemies at range. Once you have the modifiers it throws three blades as well as applies Vulnerable status towards the enemy (Enemies take 20% more damage).
Twisting Blade Core Skill
Energy Cost: 30
Impale an enemy together with your blades, dealing 300 damage and which makes them take 8% increased damage of your stuff while impaled. After 1.5 seconds the blades go back to you, piercing enemies for 500 damage.
Modifier 1 Enhanced Twisting Blades – Twisting Blades deal 30% increased damage when returning.
Modifier 2 Advanced Twisting Blades – When your Twisting Blades return, your active Cooldowns are reduced by 1 second per enemy they passed through, as much as 3 seconds. Players can buy d2r items and diablo 4 items and d2 resurrected items from a trustworthy shop like MMOWTS to gain access to powerful new abilities and strategies.
Explanation:
This is the main damage skill for that Rogue Shadow Blade Build. You always wish to apply Puncture towards the enemy first to find the Vulnerable status impact on them to increase enemy damage taken. Then use Twisting Blade to manage massive damage.
If you're fast and jump to a different target either with dodge or even the Shadow Step skill the additional blades will hit all enemies between you and the blades, this works because of the 1.5-second timer.
In addition, the skill also reduces other skill cooldowns by 1-3 seconds.
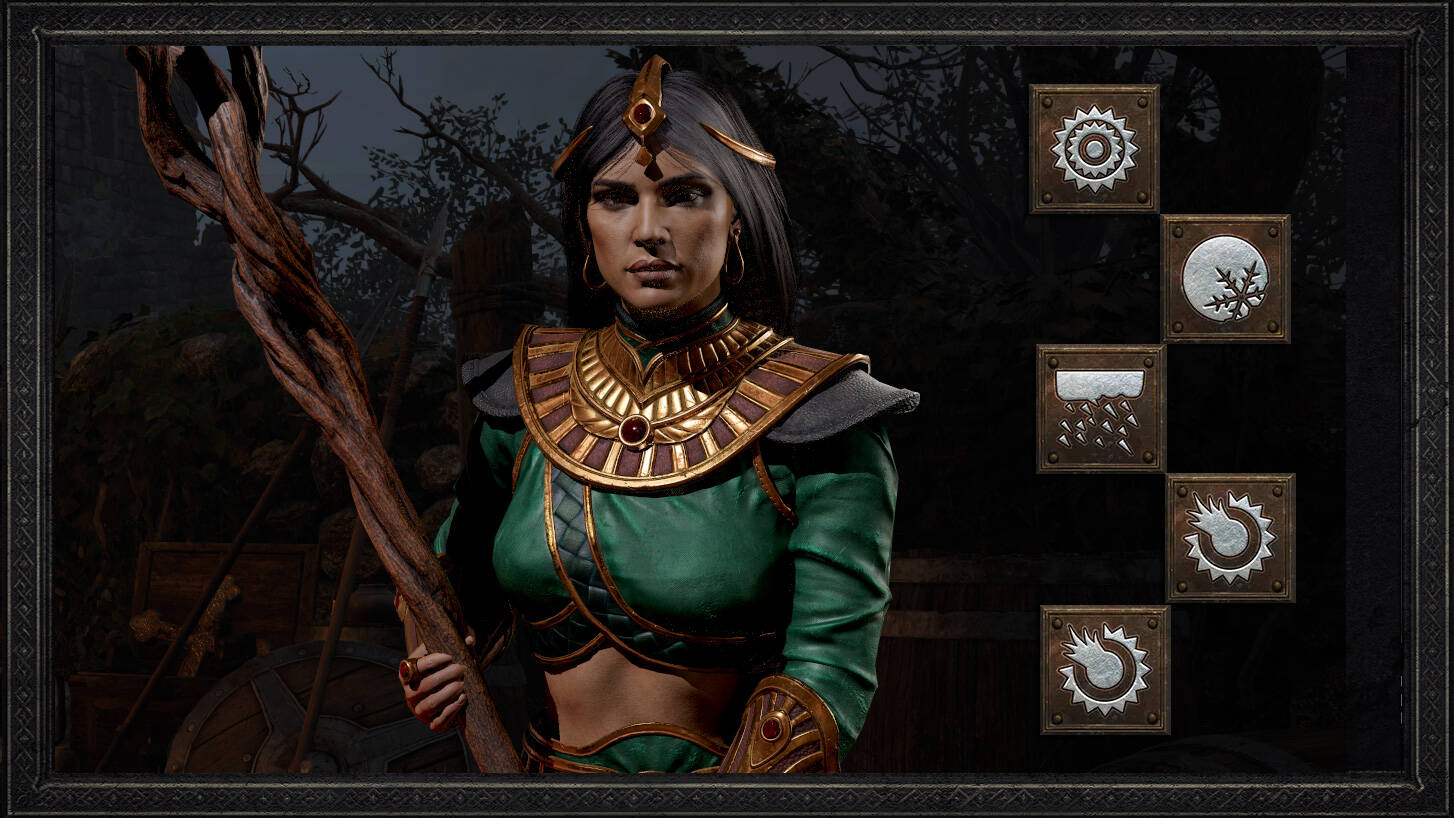
It’s all choose Assassins as Diablo 2 Resurrected season 3 begins, with Martial Arts Elemental Assassin proving to become one of the strongest builds within the classic RPG game because of the new Mosaic runeword. Meanwhile, a Diablo 2 Resurrected update has fixed a bug affecting Trap Assassins, with Blizzard updating its recent patch notes to reflect a hotfix for online play that'll be applied to offline players later on.
The arrival of recent Diablo 2 Resurrected runewords in patch 2.6 was always prone to cause some meta shakeups, also it seems to date like Martial Arts Assassins are simply as exciting as initially expected. The Mosaic runeword actually got a buff following PTR testing, and therefore each one now applies a 50% opportunity to not consume charges on finishing moves.
You can therefore run only one to get that bonus, or dual wield for any 100% guaranteed opportunity to not make use of your charges. In addition to this, Blizzard designed a change to ensure that when finishers are executed in this manner, it now refreshes the expiration timer around the stack. That combines right into a huge buff for that class, letting them spam finishing moves non-stop for huge bursts of harm.
Diablo 2 Resurrected Twitch streamer and YouTuber Alex ‘MrLlamaSC’ Sementelli showcases one such build in action within the video below, initially starting by spamming a steady flow of meteors along with enemies, then floods of lightning with every kick. He then stacks all his finishing moves along with each other, and can’t restrain a delighted grin. “There’s finally another S-tier build, but my dear god if it's not the Path of Exile Assassin,” he exclaims.
“Put in your sunglasses, everybody – this is S-tier, players: eight [difficulty], Martial Arts Assassin.” MrLlamaSC explains the way the charges all continuously refresh, so long as you manage to kick once before the charges disappear. Despite playing around the hardest setting, he laughs, “this character’s not fully at their maximum, and she or he is disgusting.” Players can buy d2r ladder runes and diablo 4 gold from a trustworthy shop like MMOWTS to gain access to powerful new abilities and strategies.
If you'd rather play a Trap Diablo 2 Resurrected Assassin build instead, you’ll be very happy to hear that Blizzard has deployed a hotfix resolving an unintended nerf. Trap skills were designed to benefit from gear that applied negative enemy resistance, however, it wasn’t working correctly. Blizzard says “the bug fix went accept patch 2.6 but encountered a surprise issue,” but a hotfix has now amended it for online play. A fix is originating for offline play “later on.”
1. Farm Before Moving On
If you complete each quest and continually move ahead, you'll eventually be under-leveled for that content. When you finish an Act or unlock a brand new difficulty, you need to replay completed content before moving forward.
Areas like Tristram in Act 1, the Tombs of Tal Rasha in Act 2, and also the Chaos Sanctuary in Act 4 are perfect spots to grind some XP and gear. Once you completed Act 1 Quest 3, start a brand new game and clean out Tristram some more times. This will provide you with the boost you have to continue your trip and extinguish the Prime Evils.
2. Attack High-Priority Enemies First
The monsters of Sanctuary are often clustered in groups. The Fallen that you simply come across typically have a few Fallen Shaman around, and Blood Hawks will never be too far from the Blood Hawk Nest. Identify the highest-priority enemies and pay them down first, don’t simply take on the pack in general.
Fallen and Blood Hawks often just distract you against attacking their stronger counterparts. When you encounter a pack of Fallen, locate any Fallen Shaman and remove them before they can cast their spells. Buying d2 resurrected items can help boost your gear in D2R Ladder, which benefits physical damage dealers and specs that benefit from scaling.
3. Save Items For Other Classes
When you play the first character, you might be tempted to only save items that apply to that particular class. Even if you don’t think you’ll ever create a Barbarian, you need to still save all Immortal King’s Set pieces that you simply find.
Whether you get making a Barbarian or otherwise, items for other classes can continue to come in handy. The Act 5 mercenary uses most of the same items as a Barbarian and also the Immortal King’s Set can trade for items that you simply do want (if you’re playing online). So if you look for a rare item, save it. Players can buy d2r items and diablo 4 items from a trustworthy shop like MMOWTS to gain access to powerful new abilities and strategies.
The Ladder is a competitive ranked scoreboard in which the players race to achieve level 99 hanging around. Ladder differs from non-Ladder while you cannot mix the characters. You will obtain rare Items that are just available here. Each Ladder is perfect for 6 months as well as on the reset, your Ladder character turns into a non-Ladder character.
After a Ladder reset, launch a multiplayer game and head towards Tristram, and perform a couple of runs there. Doing Runs means defeating the Mobs and Bosses in the region over and over again to level up. I recommend carrying this out till you reach level 14 at least. Getting a higher level than 14 won’t be bad. Once you reach level 14, You will have to leave Tristram and visit Act 2. Here you'll have to grind through Tal Rasha’s Tomb many times until you reach level 20 or even more. I advise getting good than level 20 is much better but you can visit level 20. The Mobs in Tal Rasha’s Tomb will give you a lot of EXP. Buying D2R Ladder Runes can help boost your gear in D2R Ladder, which benefits physical damage dealers and specs that benefit from scaling.
Once you reached level 20, complete Act 2 and go to the next Act. You will have to glide through Acts 3 and 4 before reaching the following EXP farm location. Once you reach Act 5, You will have to defeat the Ancients with Normal difficulty. Before you visit defeating them, be sure you have reached level 24 by completing the Quests from prior Acts. From your Ancients Quest, you will get a level that will make level 25. If done properly, you'll be able to do the runs over here without any problems. Now that you are level 25, this next run will probably be easier. Your next run is going to be beating Baal. You will have to beat Baal many times till you reach level 40.
This is how things get interesting, you'll have to play the game in Nightmare difficulty and obtain back to Ancients like before. You can get enough Levels here to ensure that Nightmare Baal won’t be as difficult. As you guessed Nightmare Baal is the following EXP location. Do a handful of runs with Nightmare Baal till you reach level 60. Now at this time, you might or might not have decent gear, so farming certain Nightmare Bosses like Mephisto will help get you those good gear.
This may be the final stretch of the Ladder climbing journey, you have to play this stretch in Hell difficulty. Like what we should do within the prior steps, you'll have to repeat them till you reach Hell Chaos Sanctuary and Hell Baal. These two will be your main causes of EXP grind. Run through both of these till you reach level 99.
cheap d2 resurrected items and more at MMOWTS
